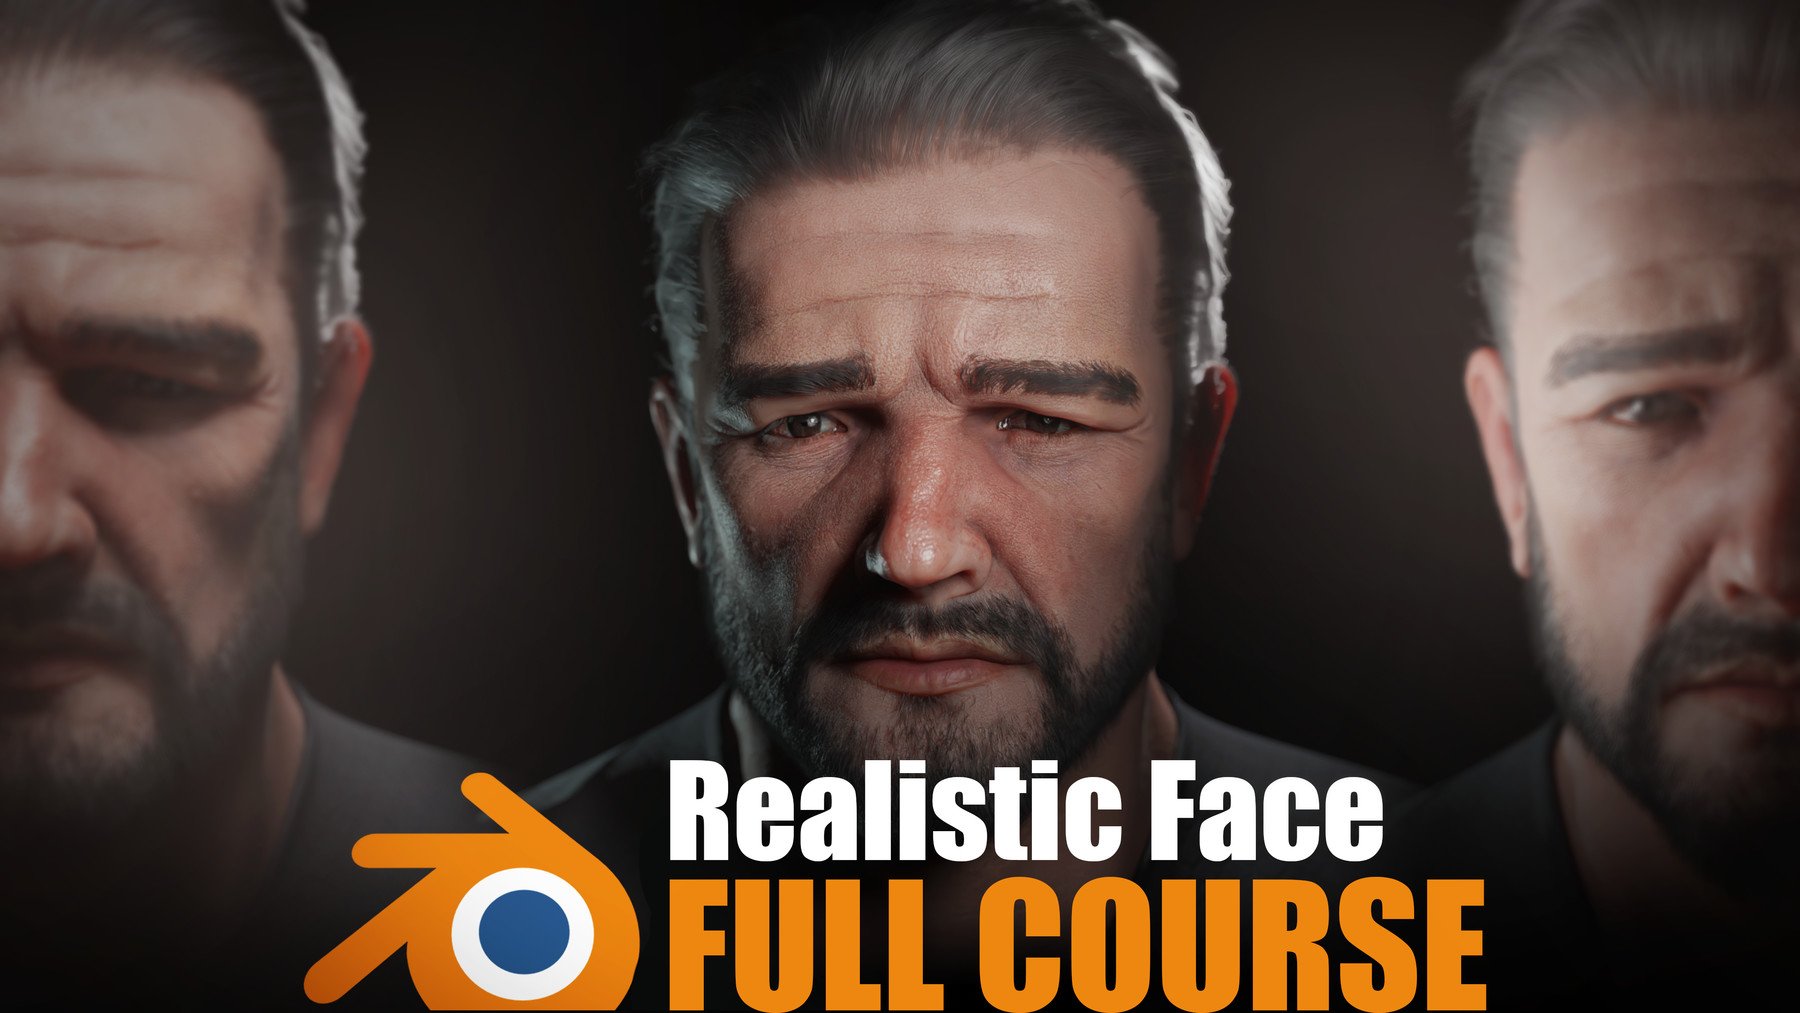
|TUTORIAL| Realistic Face Creation in Blender


Hello!
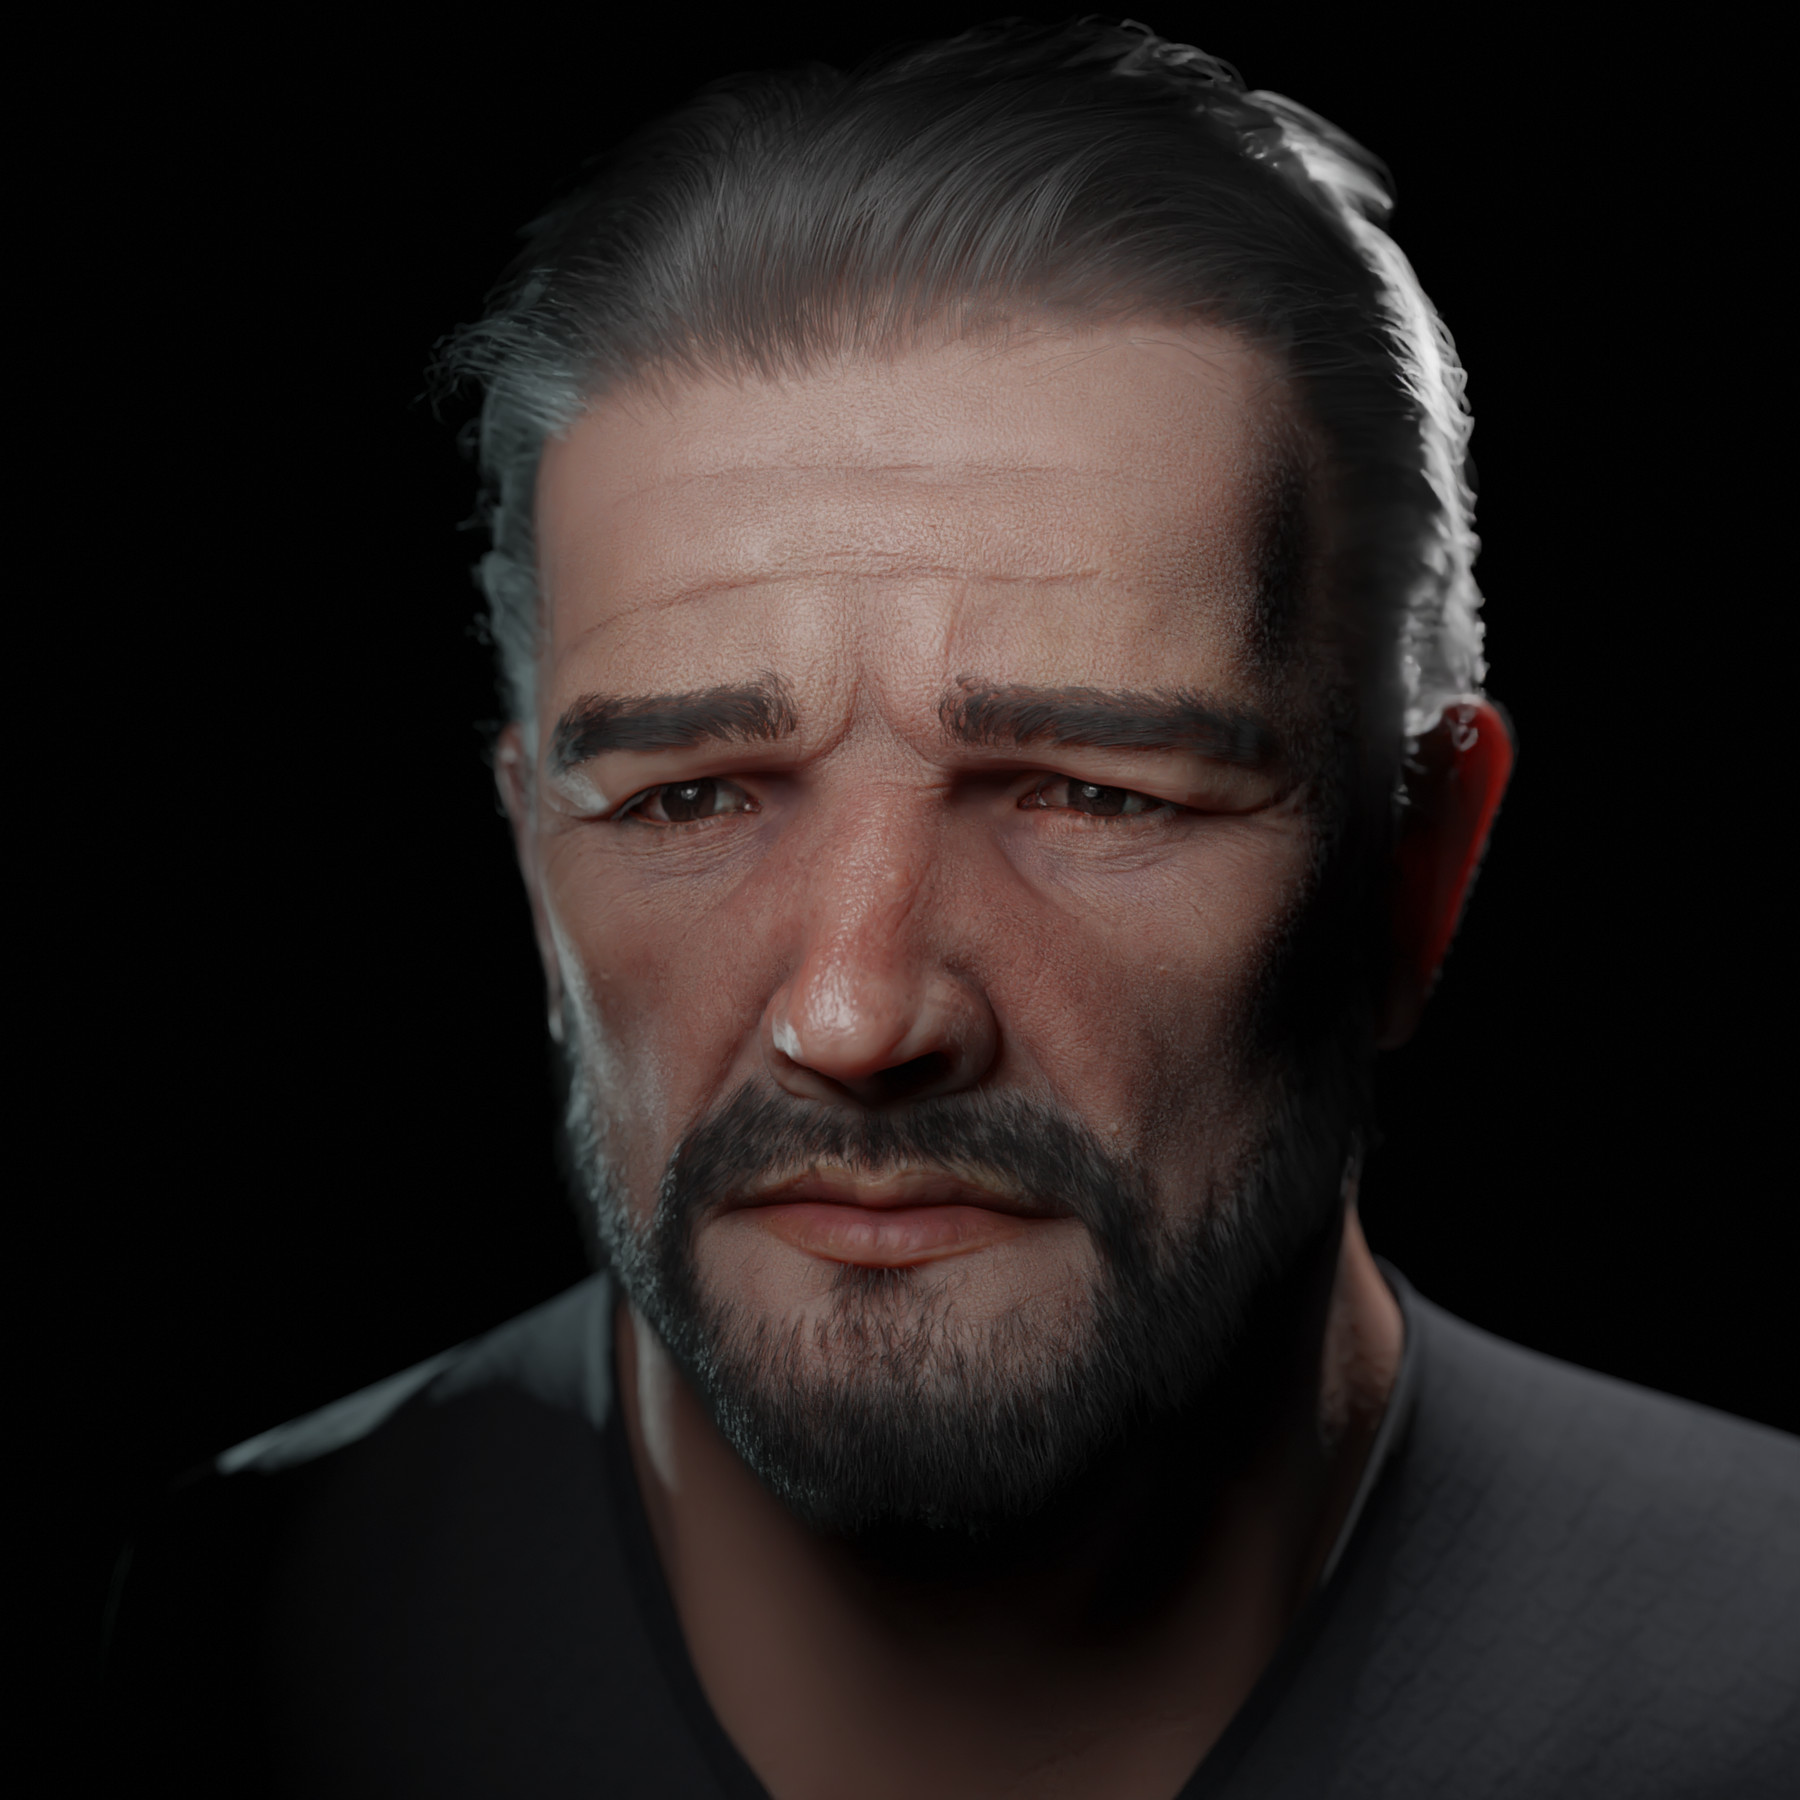
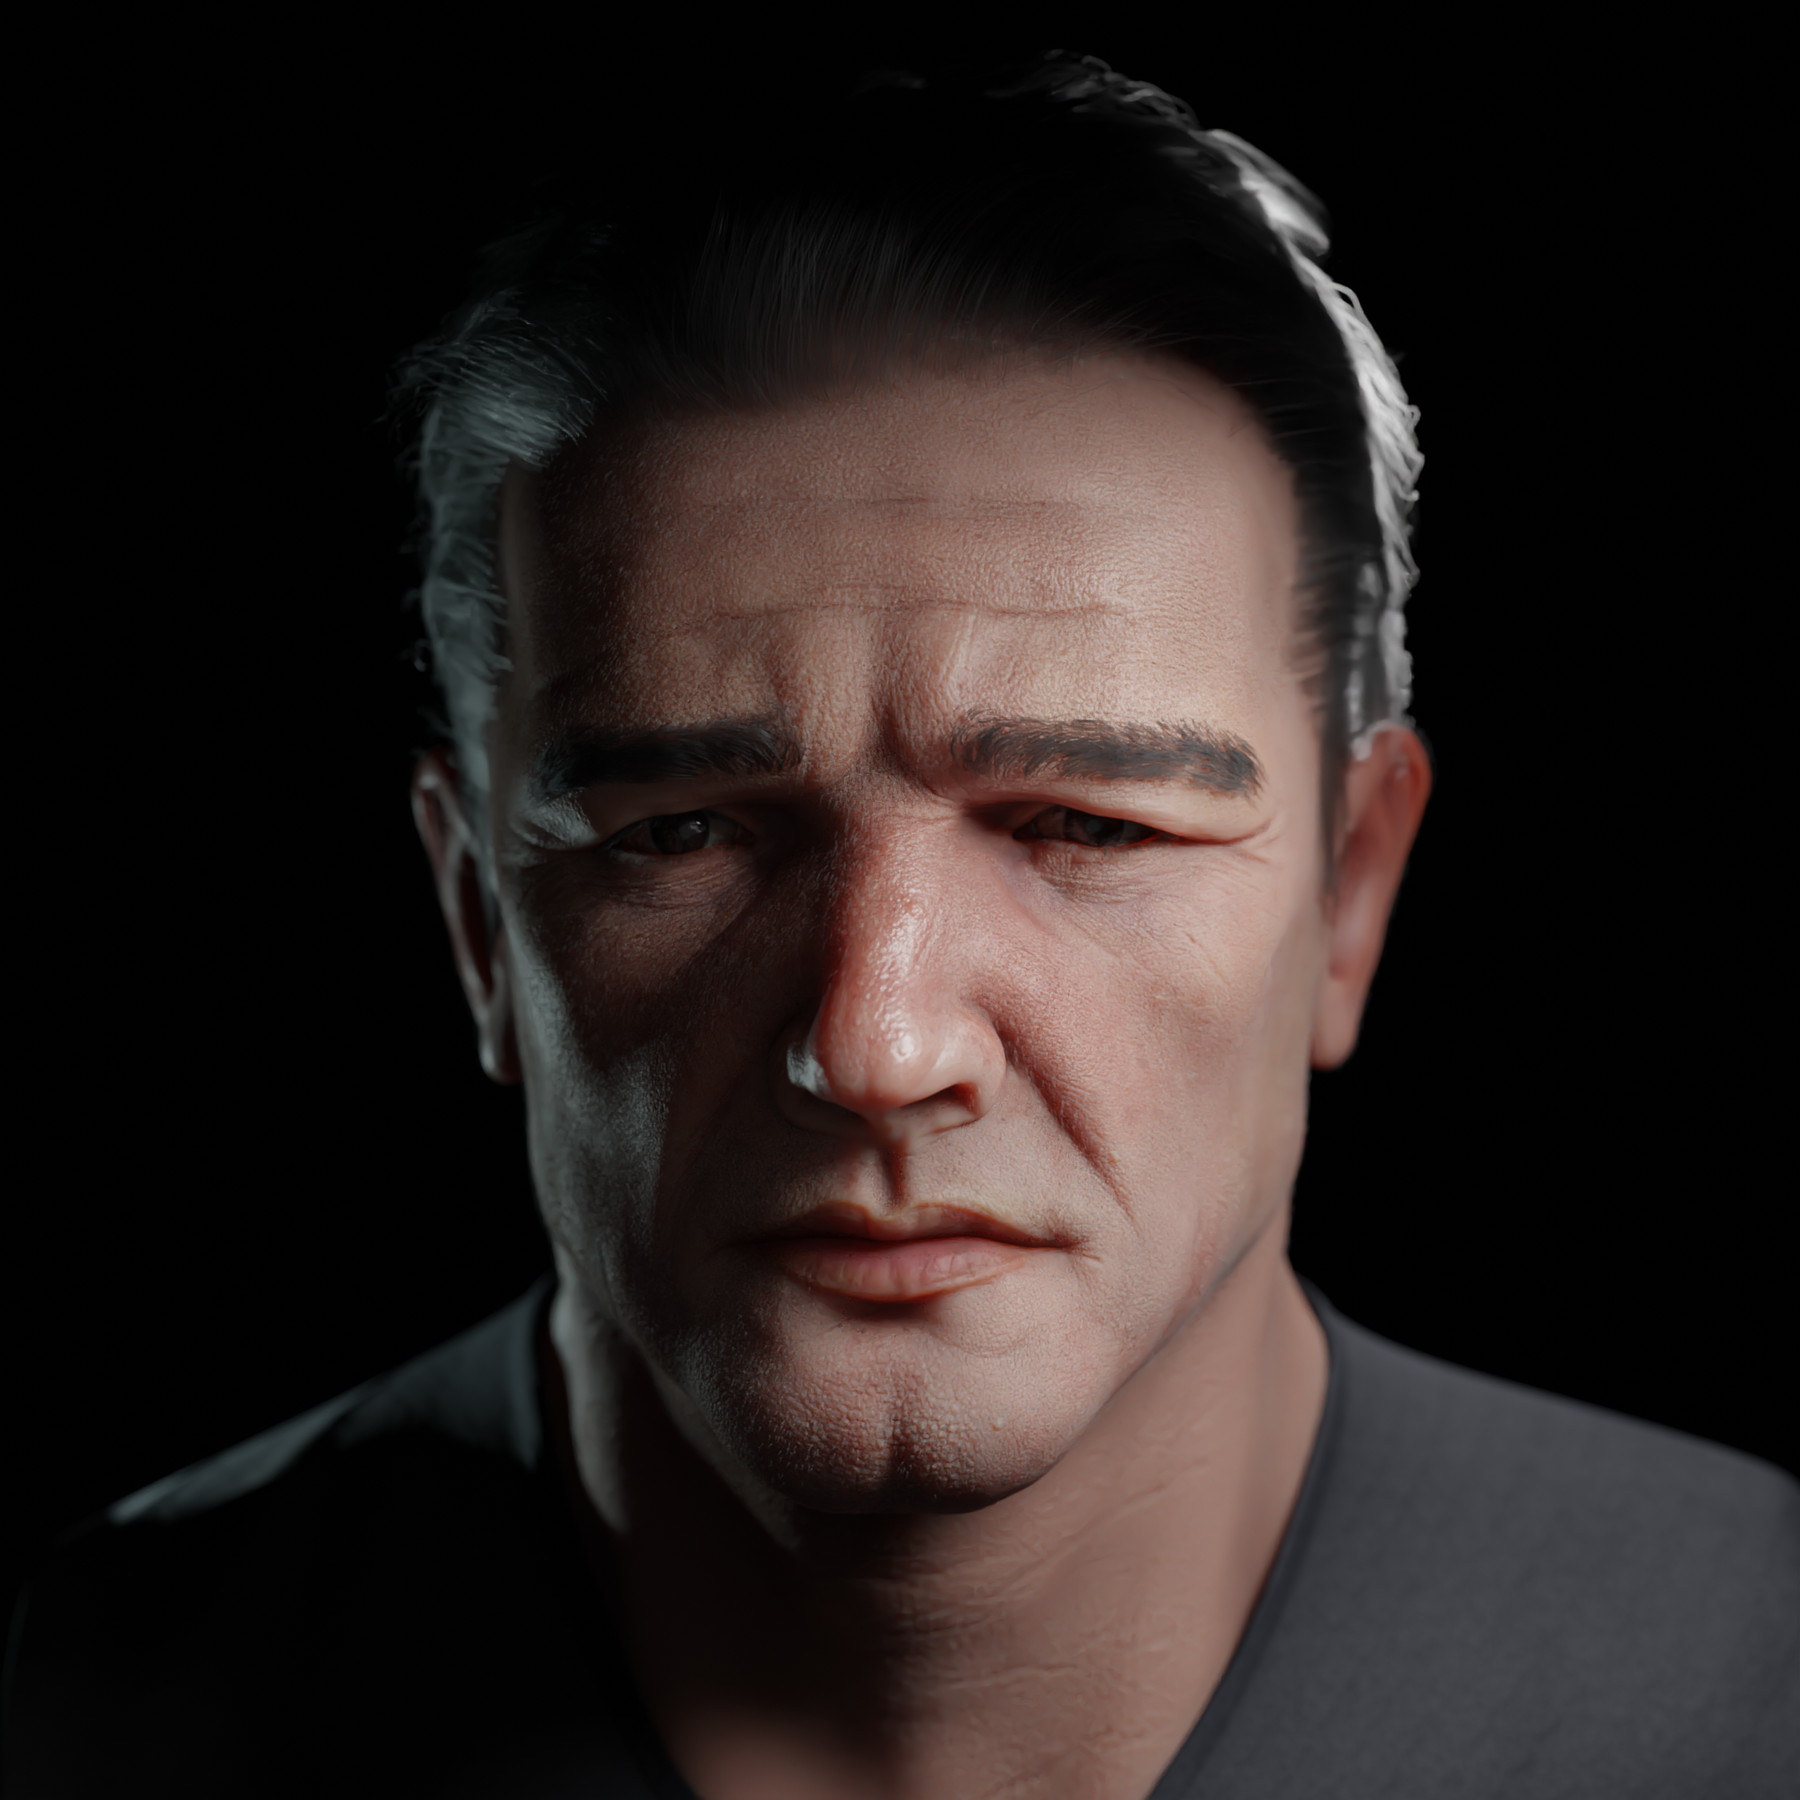
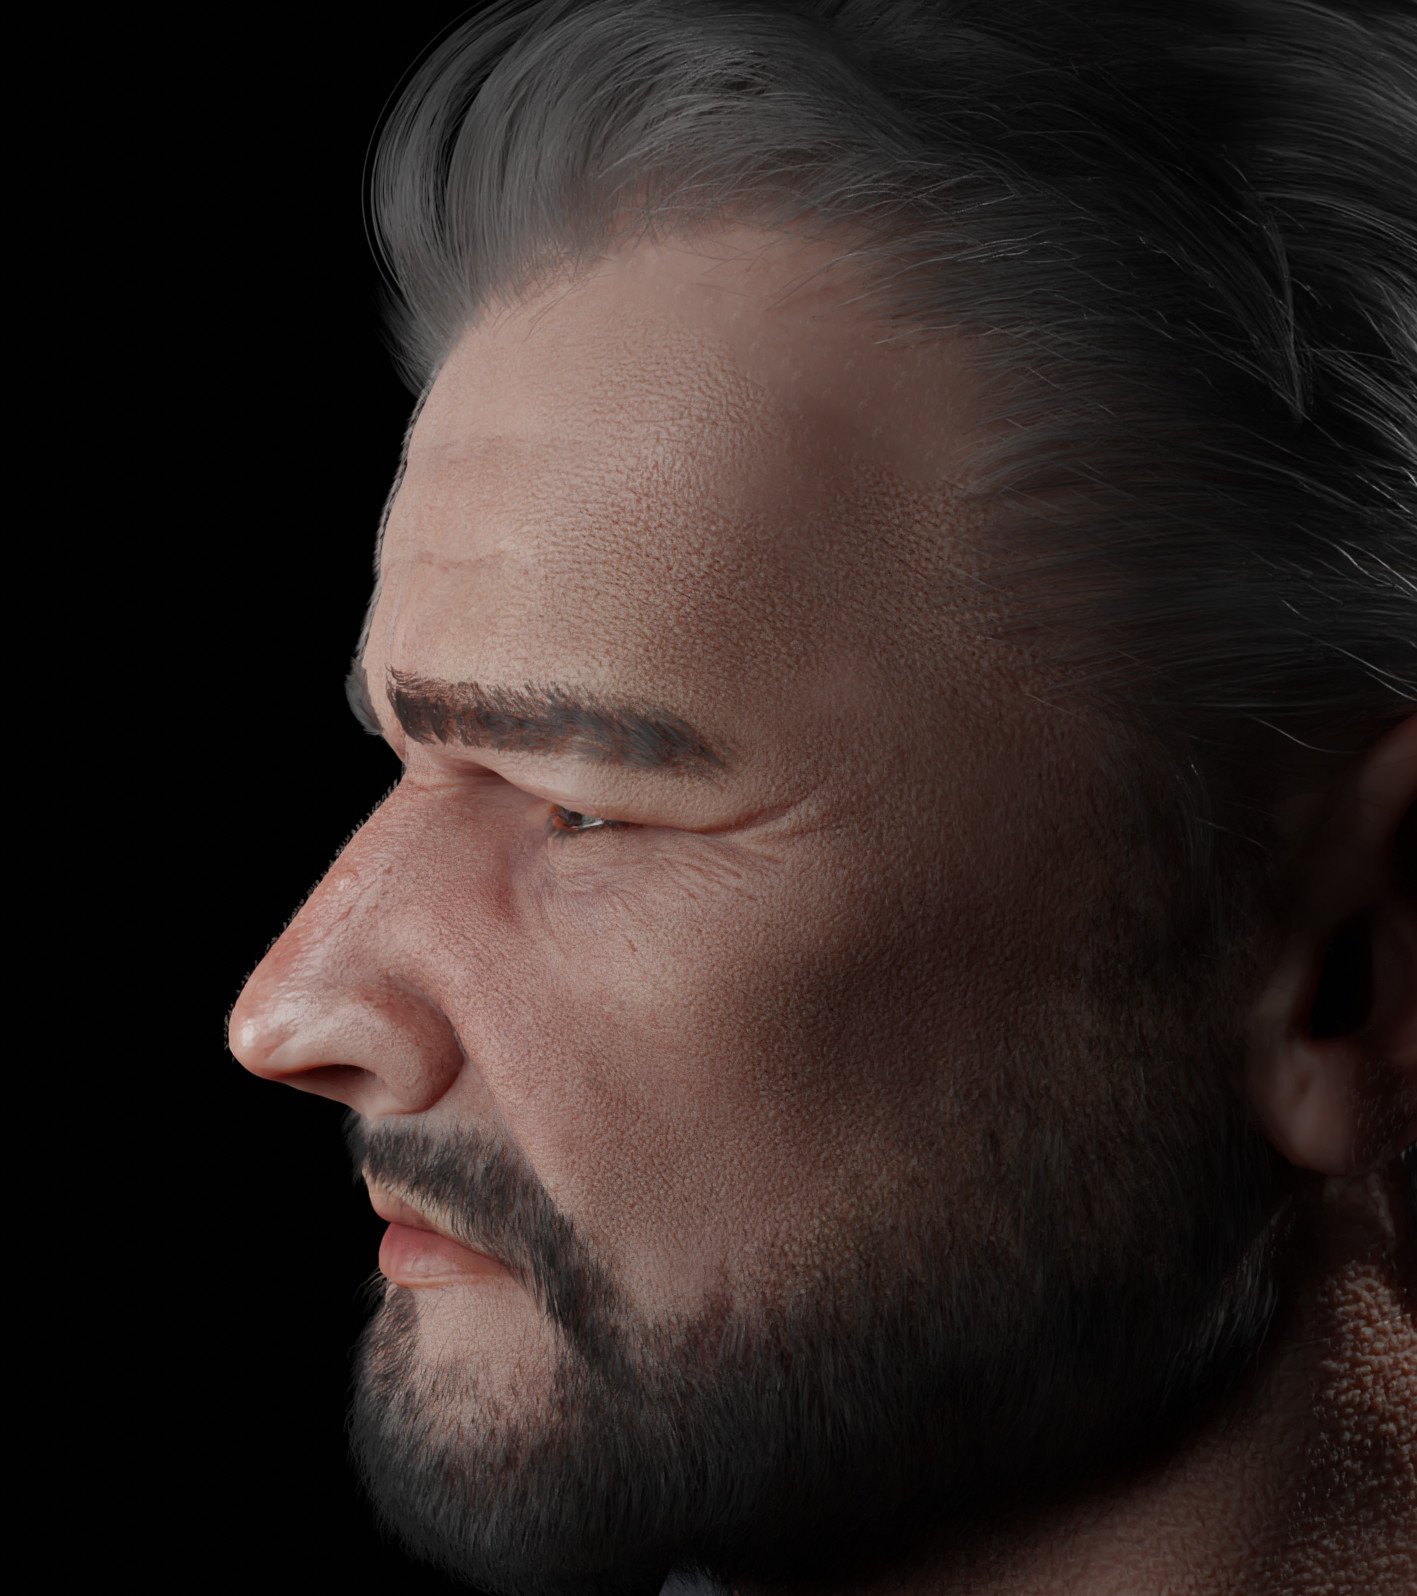
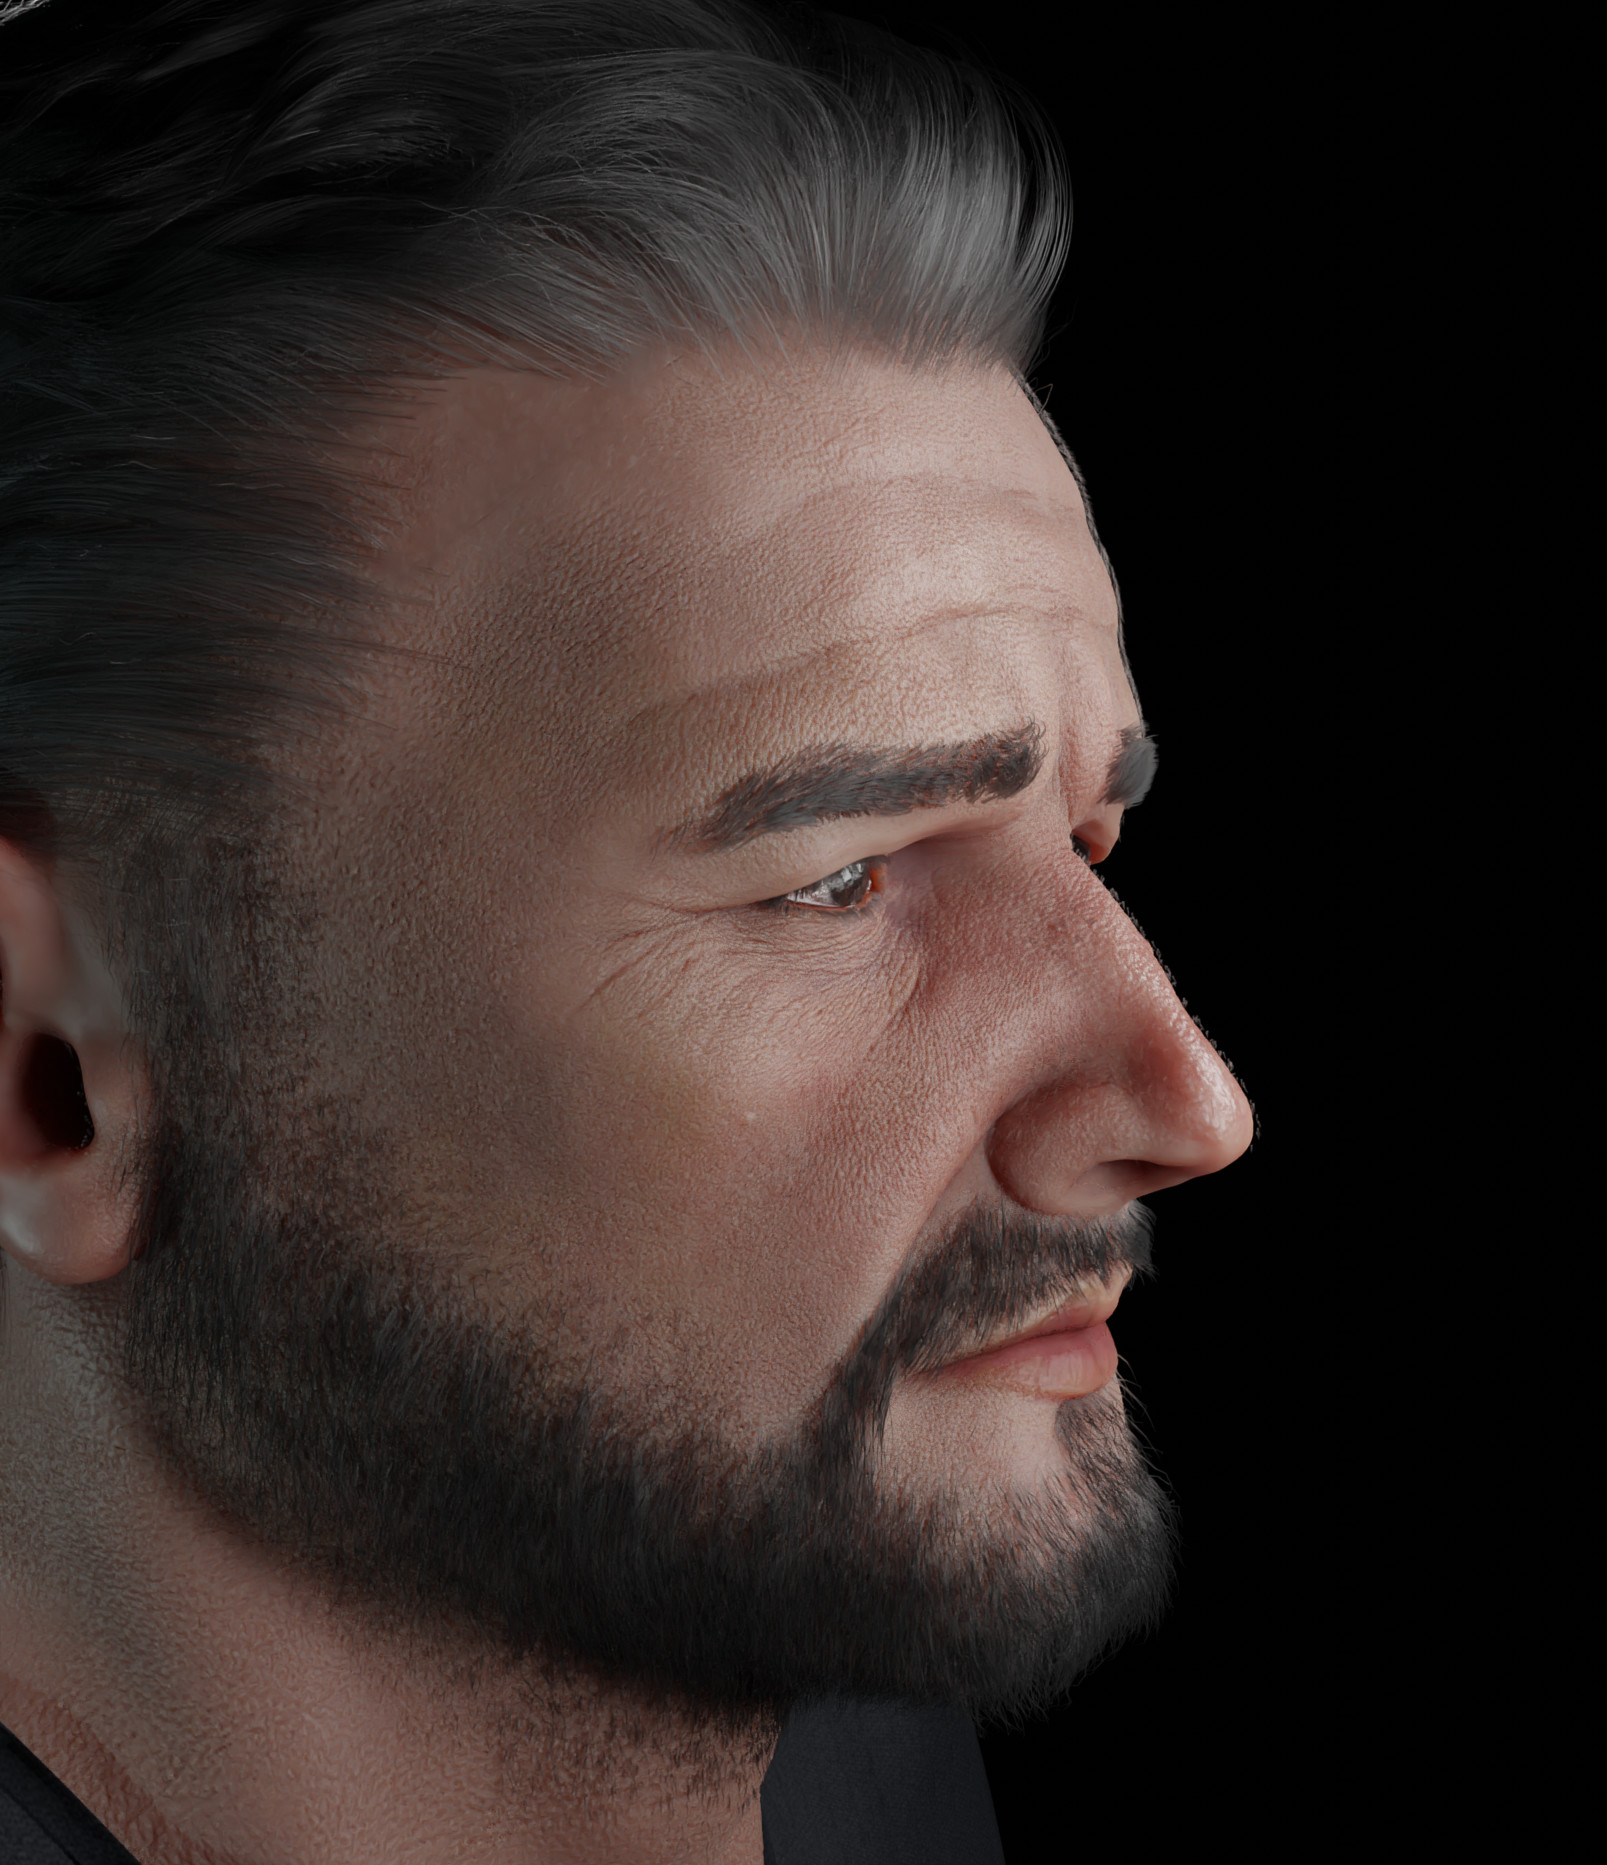
In this course, I will walk you through my approach for creating a realistic face in Blender! Everything is made using a free software package- Blender, XNormal, Photoshop/Krita.
I will explain to you some basics of facial anatomy and give tips and tricks on how to find all the most important landmarks in your sculpture.
After this, I gonna walk you through all the stages necessary to create a believable face.
When we will be done with the face, I gonna introduce you to a Hair Particle System implemented in Blender. I'll show you how to groom your character, and create all the facial hair.
In the end, I will present to you my material setup and explain how to render your work in Cycles.
What's inside:
Video Tutorials:
- Introduction and reference talk- Short intro and talk about gathering proper references
- Skull anatomy and proportions- I will show you bone landmarks to look for in your sculpting process, as well as proportions of the face. In the end, we gonna look at some real-life photos and figure out what lies beneath the skin.
- Face anatomy and fat landmarks- Here we will focus on specific parts of the face, like mouth or eyes and fat tissues that sit under skin. In the end, like in the previous one, we gonna take a look at the reference photos.
- Base sculpting- We will sculpt our base mesh on top of which we gonna build proper topology.
- Face fixing- In this video, we gonna take our retopped model in order to refine proportions and fix basic shapes.
- UVing- We will do a UV mapping for our character.
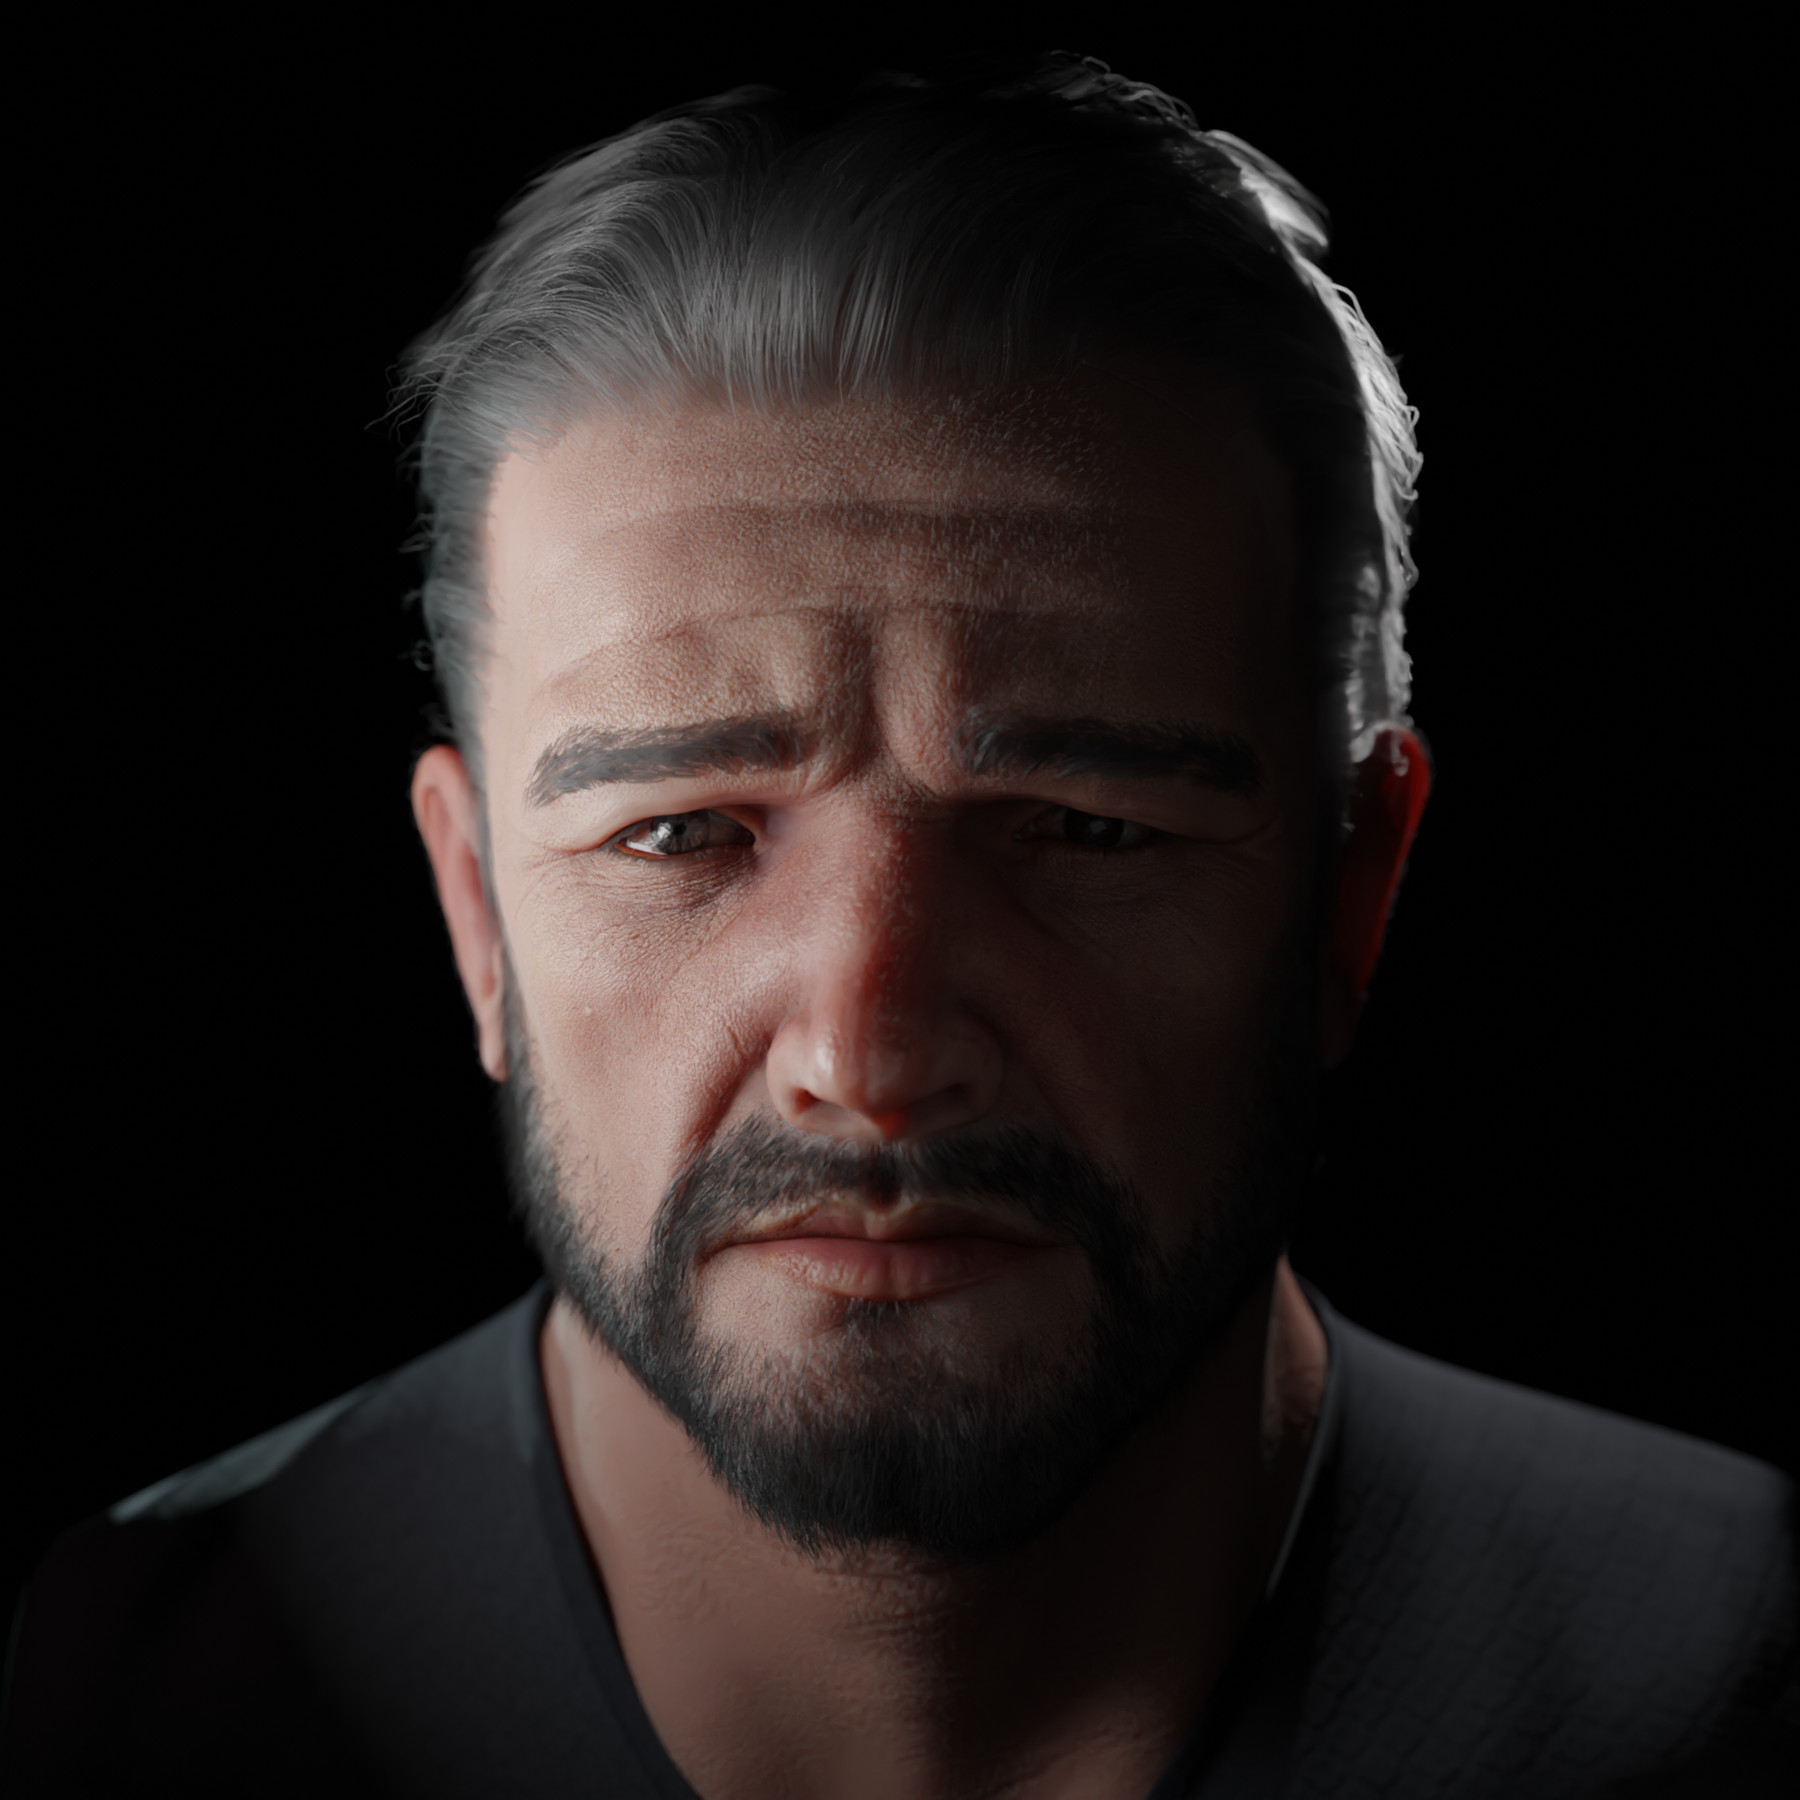
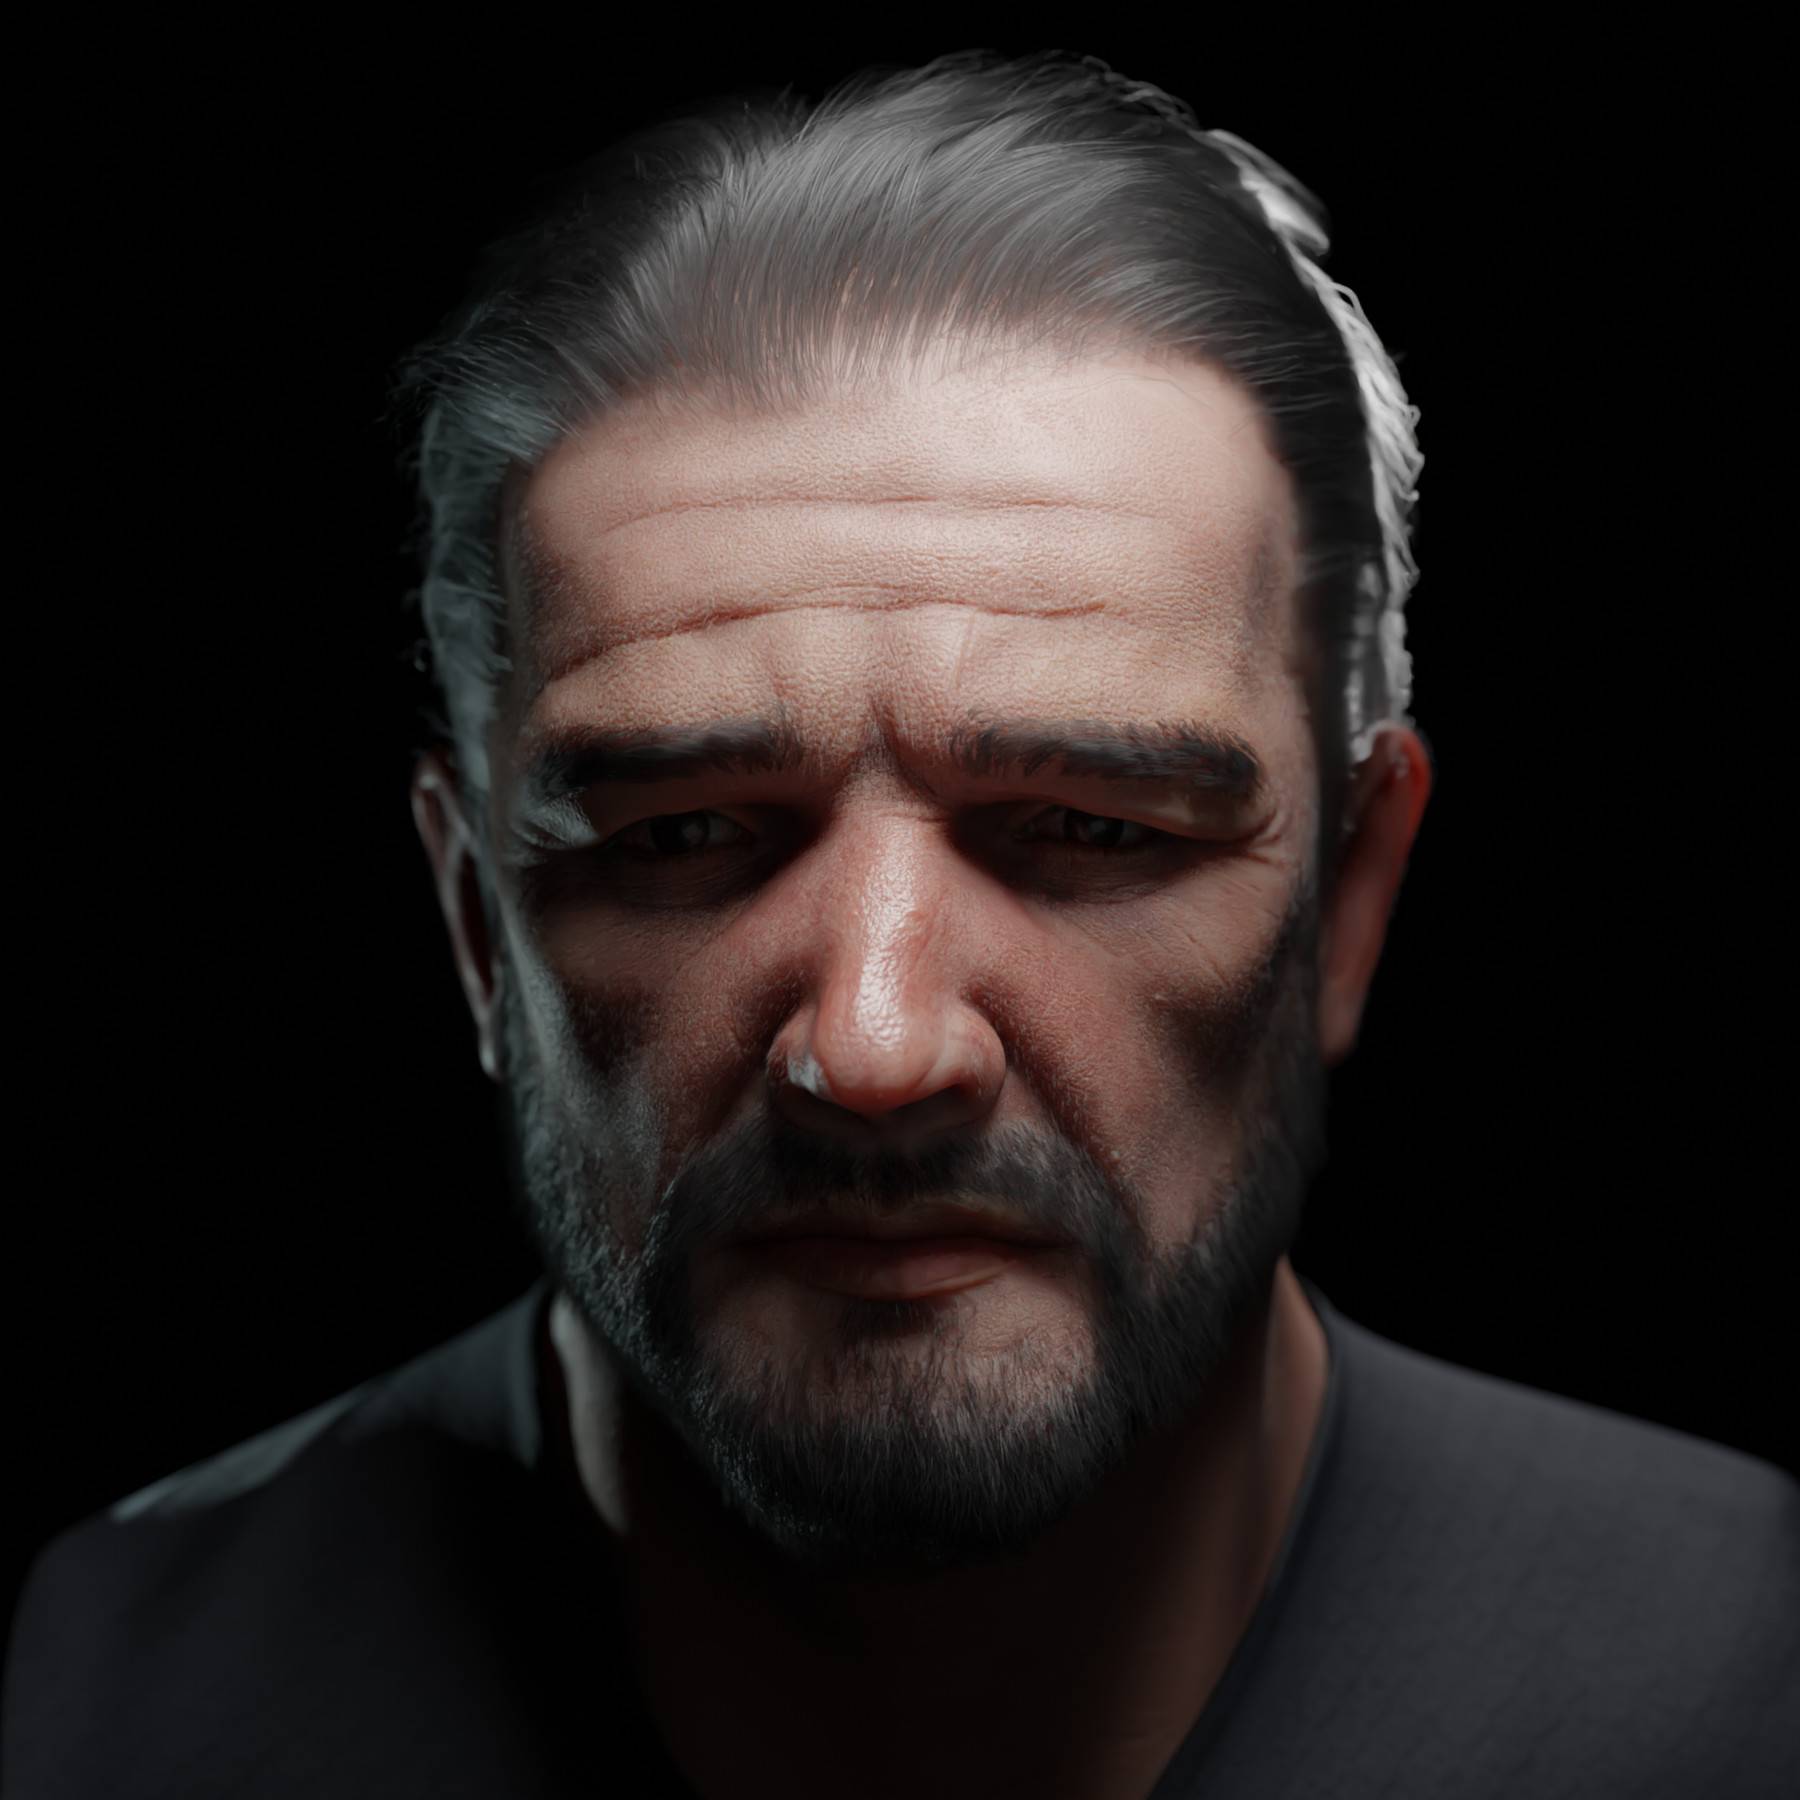
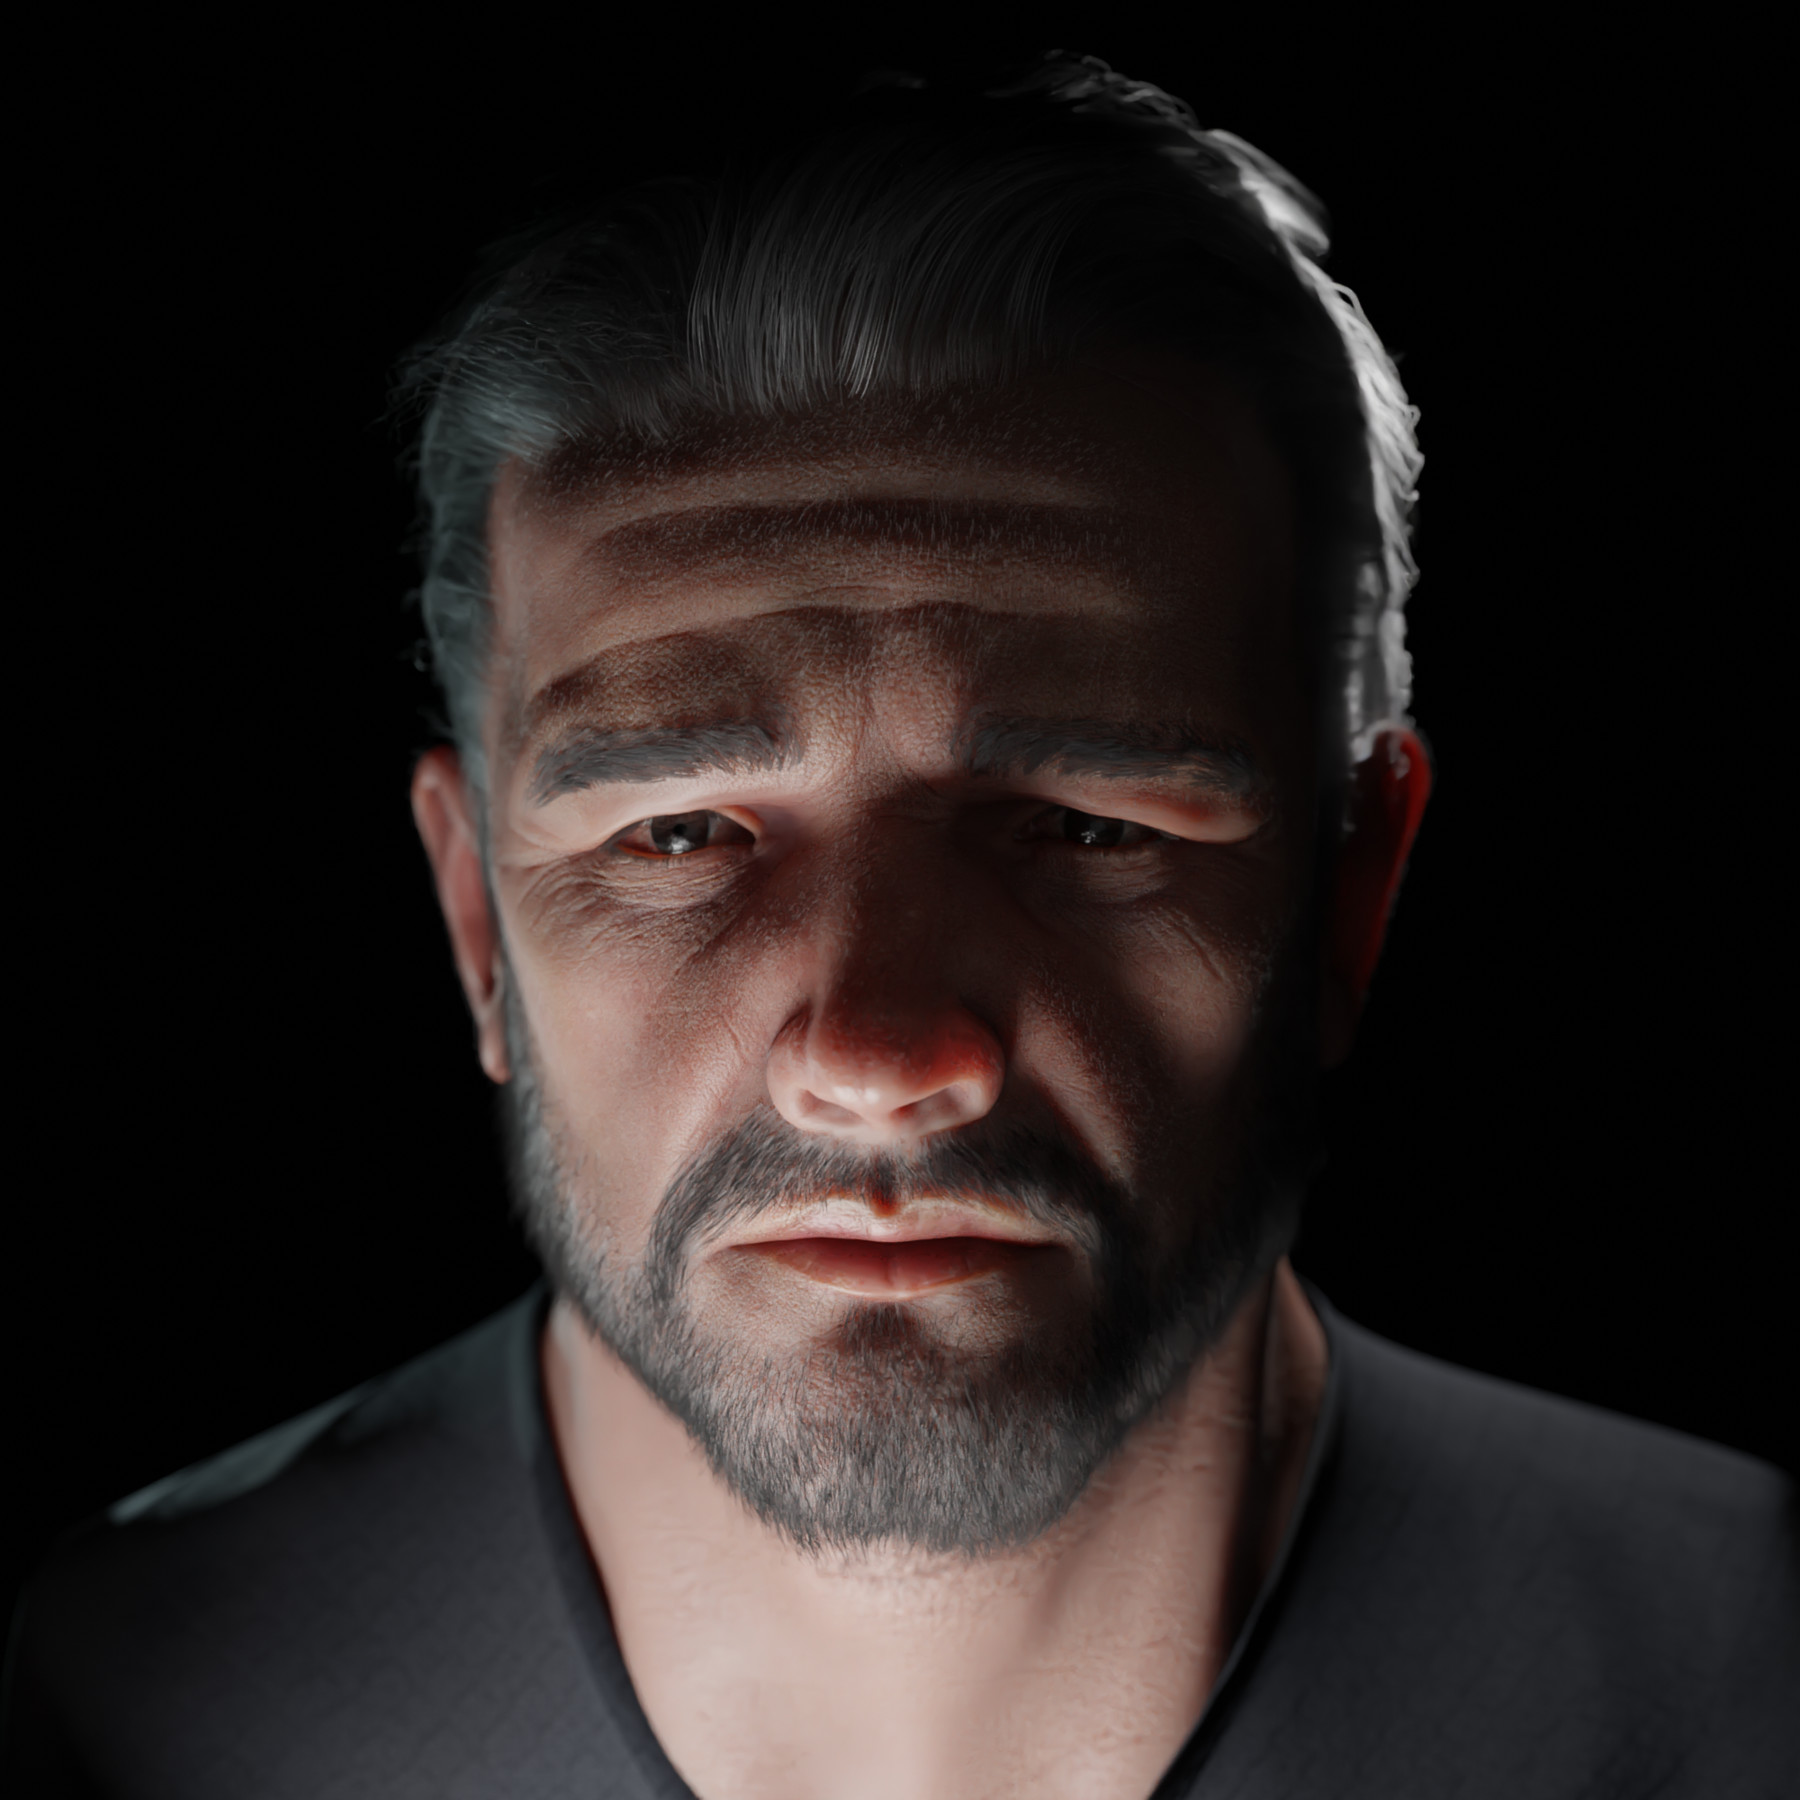
- Sculpting- Here we will finally do sculpting of the face.
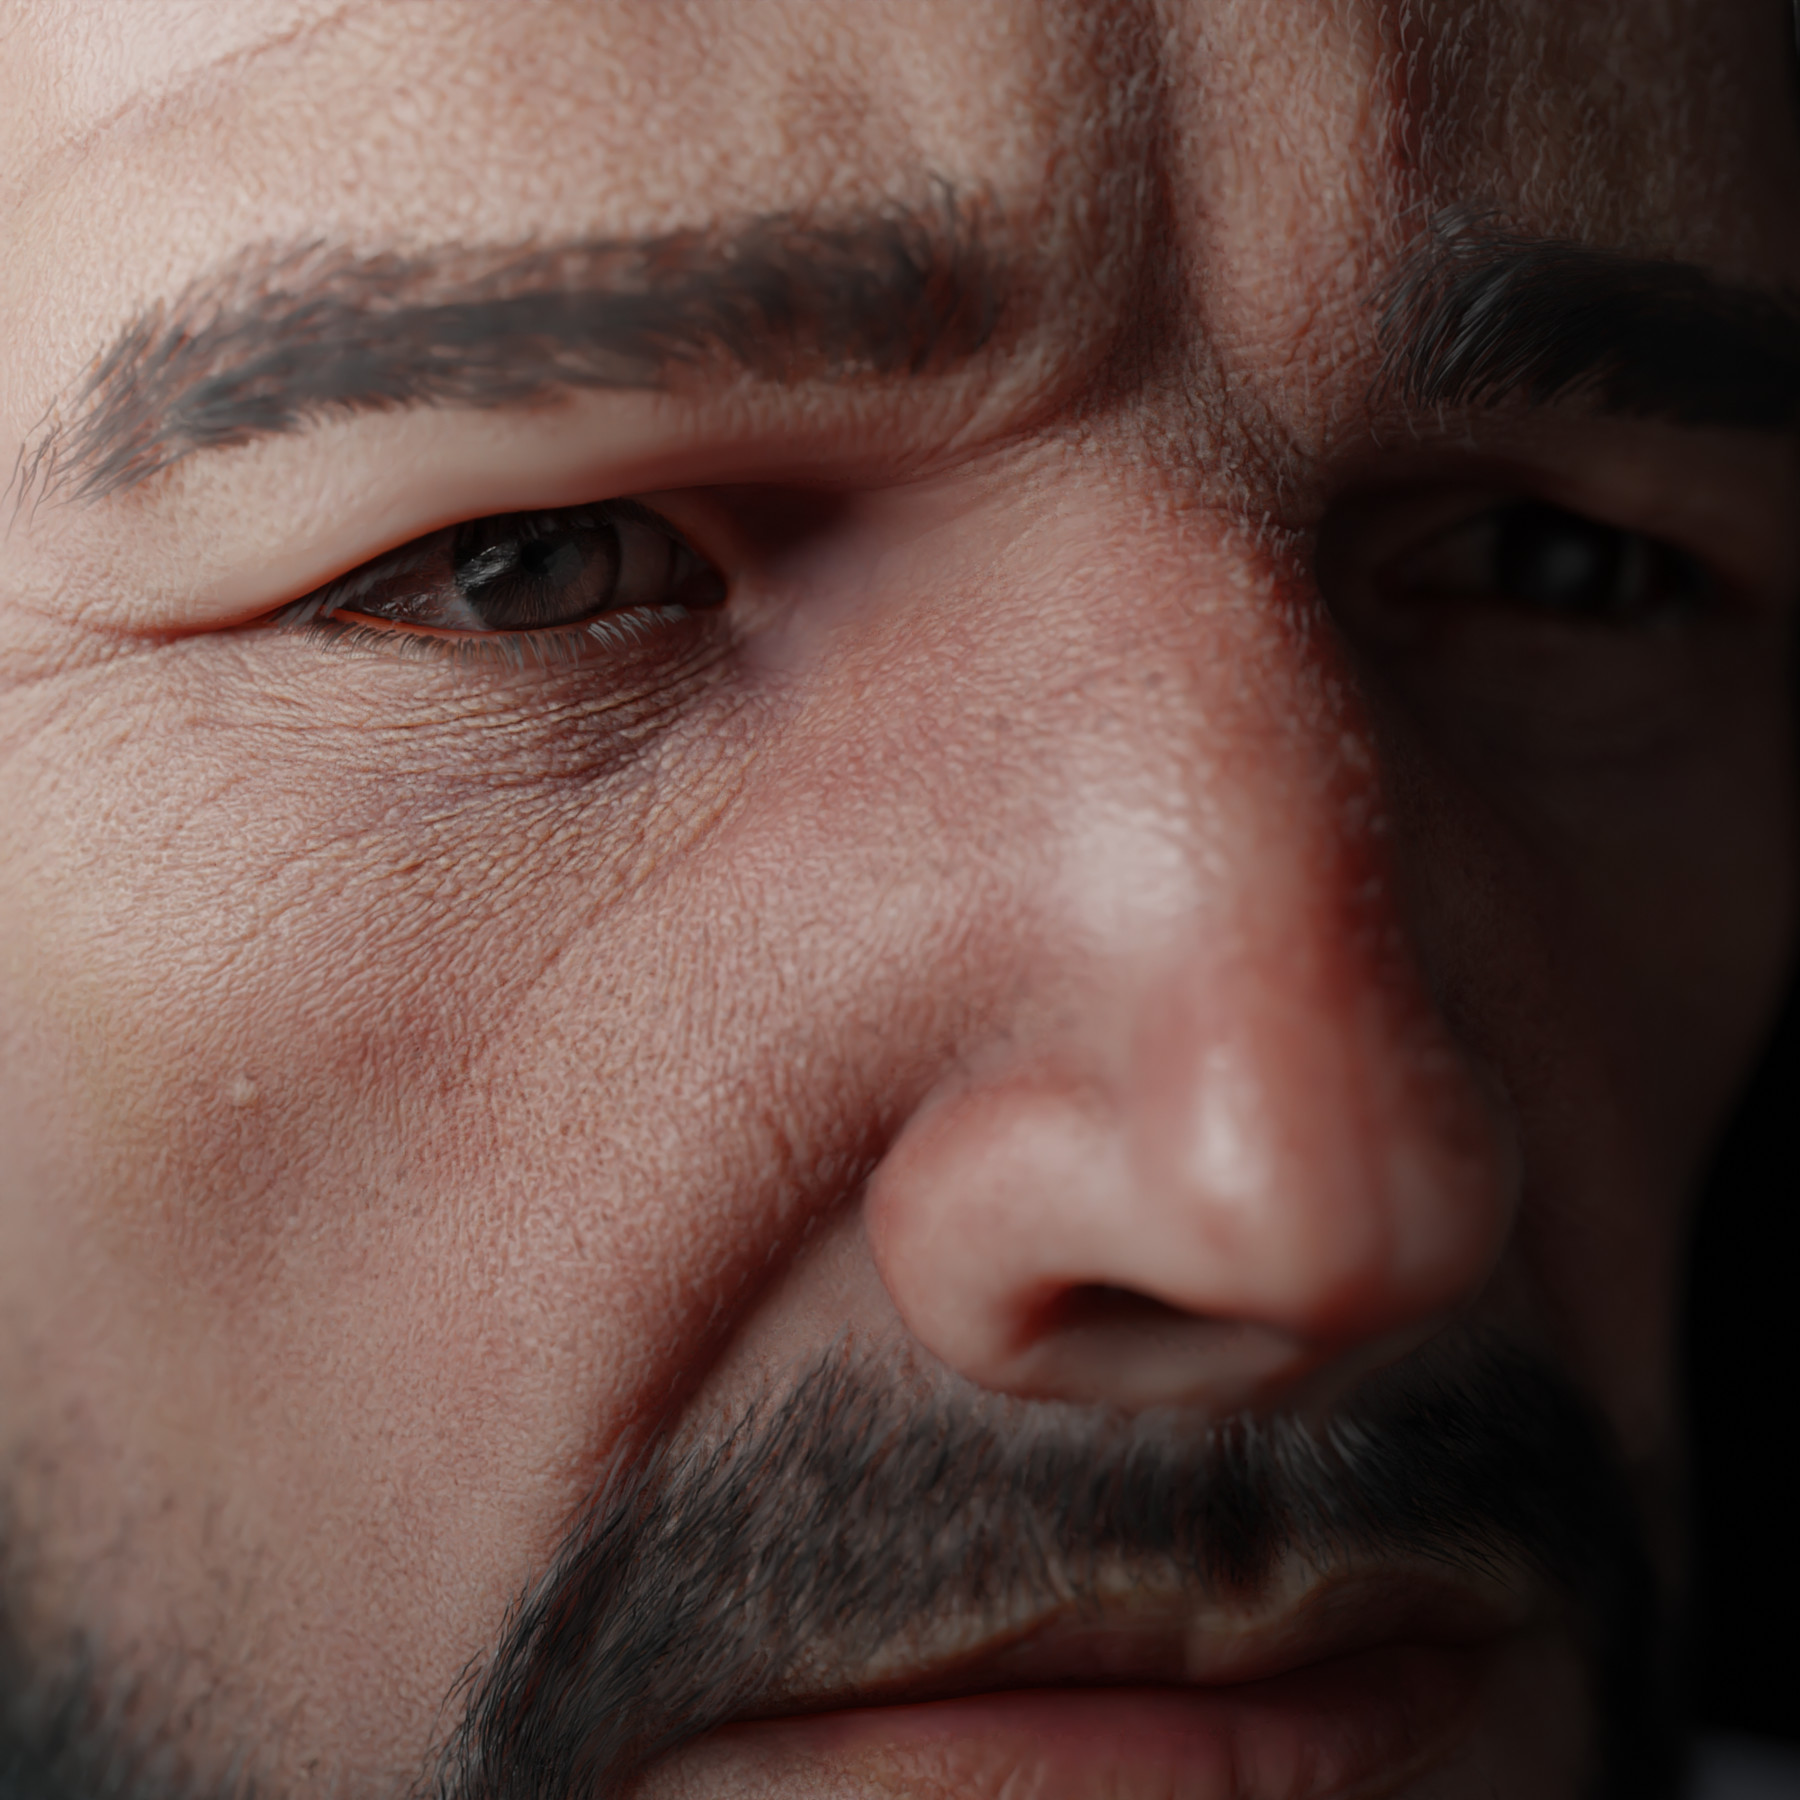
- Detailing- I will show you how to utilize alphas in order to create believable pores and wrinkles.
- Baking- We will bake all the essential textures in XNormal.
- Texturing- In 2D software we will paint necessary textures for our character.
- Introduction to hair particle system- Here I will introduce you to Blender particle system and walk you through methods of generating and controlling the hair guides.
- Facial hair groom- Here we will do eyebrows, eyelashes, beard and peach fuzz for our character.
- Material Setup- And last but not least. I will show you how to plug all the textures and shade your character properly.
Meshes:
- Low poly Mesh.
- High Poly Mesh.
- Base Mesh.
- Blend files:
- Final Composition
- Face with multi-res modifier
- Face with multi-res modifier and hq details.
Other:
- Txt file with helpful links
- Transcripts.
Requirements:
Basic knowledge of Blender. (I don't explain every tool and shortcut I use)